Getting Started with Embroidery
Are you just starting out with embroidery? Then start by reading our blog, “Embroidery for Beginners: From Handy Stitches to Fine Embroidery Threads.” In that blog, we explain everything you need to know about the basics of embroidery. Do you learn better with visuals? Then check out the 24 video tutorials on our YouTube channel. There, you’ll learn how to embroider a cross stitch, and we’ll also explain more complex embroidery stitches like the satin stitch, whipped wheel stitch, and fishbone stitch.
Inspiration: What kinds of designs can you embroider on clothing?
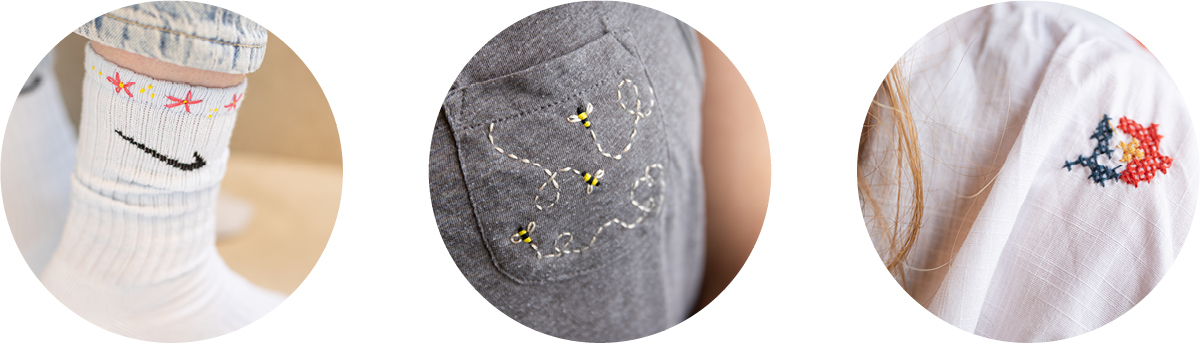
What kinds of things can you embroider on clothing? Anything! From text in backstitch to colored designs using the satin stitch, and from simple cross-stitch patterns to intricate embroidery. Our main tip is: don’t start with something too difficult. If you’ve never embroidered on clothing before, it can be quite tricky. You’ll make mistakes, have to rip out your work, and start over, so if you have the option, try it on a practice swatch first.
You can find lots of beautiful examples on Pinterest, but you can also find plenty of free patterns to use on sites like DMC. Be sure to check out the Embroidery Patternson our website, too.


Tools & Supplies for Embroidery on Clothing
Once you've come up with an idea, you can get started. What do you need? Here's what:
- Embroidery Thread
- Needle with a sharp tip
- Water-soluble marker
- Small scissors
- An embroidery hoop, if desired
- Clothing item


Embroidery on Different Types of Fabrics and Items
Once again: start small! Especially if you’ve never embroidered before, embroidering on clothing isn’t easy. Also, of course, there are different types of fabrics you can embroider on. For example, it’s easier to embroider on Cotton than on denim. A general rule for all fabrics: try to avoid the thicker parts, such as cuffs and seams, because it’s very difficult to get your needle through them.
Helpful Tips for Embroidering on Clothing
Hopefully, you now know what you want to make and what you’ll need. Below, we’ve listed a few Tips to keep in mind. If you follow all of them, we’re sure your embroidered clothing will turn out beautifully.
Tip 1: Choose an Embroidery Pattern
Of course, the first step is to choose an embroidery pattern. This can be an existing pattern, but if you're creative and can draw a little, you can also create your own design.
Tip 2: Use a water- or heat-soluble marker
With this marker, you can easily trace the pattern onto your fabric, and once your embroidery is finished, you can remove it by washing your garment or by briefly drying it with a hair dryer. Try on your garment and see if you're happy with the placement of your pattern.
Tip 3: Use an embroidery hoop if possible
Using an embroidery hoop makes your embroidery projects a lot easier. For example, if you’re embroidering on a sleeve, your embroidery hoop is probably too big. But it can work well on the back of a denim jacket or for a pattern on a T-shirt or sweater. Just make sure you don’t tighten the hoop too much and that the fabric isn’t stretched too tightly.
Tip 4: Choose the right colors of Embroidery Thread
If you’re using a ready-made pattern, choosing colors isn’t very complicated. Often, the colors have already been chosen for you. But if you have to put together your own color scheme, that’s quite a task. After all, there are hundreds of different colors of Embroidery Thread. The best thing to do is to look at them in our Inspiration Center and hold them side by side so you can compare them.
Tip 5: Tie knots
Normally, you're not supposed to tie knots when you're embroidering, but when embroidering on clothing, it's better to be safe than sorry. This keeps the back looking neat and ensures your yarn stays in place.
Tip 6: Take your time!
Take your time when embroidering on clothing. We understand that you’re eager to finish your project in no time, but haste makes waste. You can’t master embroidery just like that—1, 2, 3. You have to practice, make mistakes, and start over. That’s the only way to become a true pro. So don’t give up if things get tough—just set your garment aside, sleep on it, and then get back to embroidering your clothes.
Did this blog post inspire you? We'd love it if you shared your project by tagging us and using #Yarnplaza on social media.
Want to stay up to date on the latest crafting news? Subscribe to our YouTube channel and follow Yarnplaza on Instagram and Facebook.