

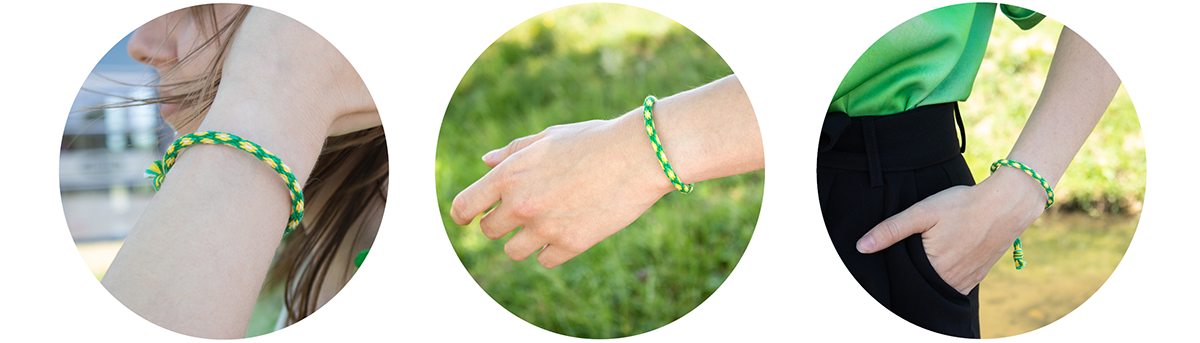
Kumihimo, or the Japanese art of braiding bracelets! Kumihimo is a wonderfully simple activity that you can do on your own or with children. It can also be a fun summer vacation activity. Read on for a free pattern that will help you braid a beautiful bracelet!
What exactly is Kumihimo? This braiding art has been practiced for over 1,000 years, especially in Japan. These days, there are handy tools that make it easy for you to braid a round or flat bracelet. For this pattern, you’ll need a round Kumihimo disc; check out all the discs here. Want to learn more about Kumihimo? Read a previous blog post where we explain absolutely everything about this braiding art, including a video.
Tools & Supplies for a Kumihimo Bracelet
- A round Kumihimo cord
- Yarn with a smooth strand and a maximum weight of 6 (we used BudgetYarn Cotton DK)
- Optional: a carabiner hook if you want to turn your braid into a keychain or bag charm
Instructions for a Kumihimo Bracelet
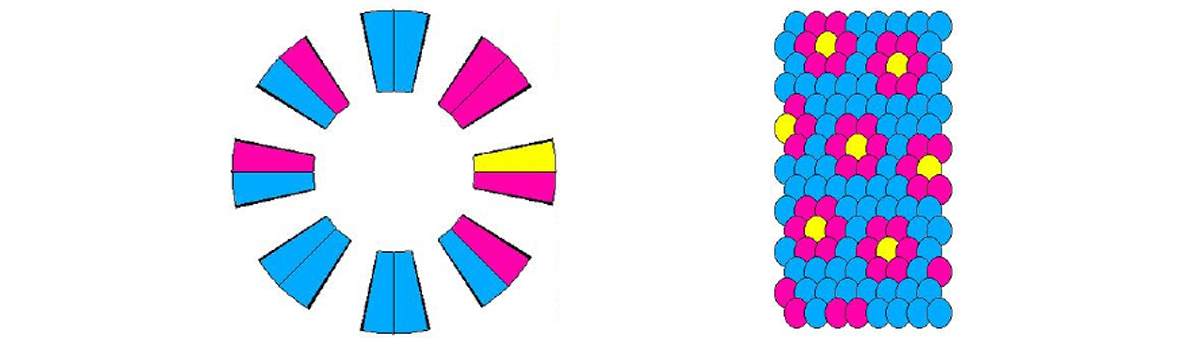
We're going to braid a bracelet with cheerful little flowers; see the pattern below. We used BudgetYarn Cotton DK yarn, but you can, of course, braid it with other types of yarn as well. Just make sure to choose a smooth yarn. Keep in mind that the thicker your yarn is, the thicker your cord will be.
Length of the wires:
If you're making a 20-centimeter bracelet, you'll need 3 x 20 cm of each color of thread (60 cm), and since you'll be using the threads in pairs, you'll double the length. So each thread needs to be 120 cm long.
Tensioning the wires:
Cut 8 strands of the desired color.
Fold all 8 strands in half and tie a knot in them to form a loop, or braid the middle section. Thread the knot through the hole in the Kumihimo disc from top to bottom.
Hold your disc with number 32 facing up, and look closely at the pattern to see how to arrange the colors on your disc.
Braiding:
Once your threads are in place, start braiding. Begin with the left thread next to number 16; this goes to the top left, above number 31. Take the thread at the top right next to number 32; this goes to the bottom right, below number 15.
Turn the disc counterclockwise to the next two wires. Now number 4 is at the top. Repeat the same steps as for numbers 32 and 16. The bottom-left wire goes to the top-left, and the top-right wire goes to the bottom-right. Keep repeating this process until the cord is long enough.
Untie the strings, tie a knot in them, and pull it tight.
TIP: Check out these helpful tutorials on this fun braiding technique.
Sign up for the Newsletter and stay informed
Never miss another blog post? Sign up for our Newsletter and stay up to date!
Share your creations on social media using #Yarnplaza
Have you made something fun too? Share it on social media like Instagram and Facebook with #yarnplaza, and who knows—your creation might just be featured on our Wool of Fame!